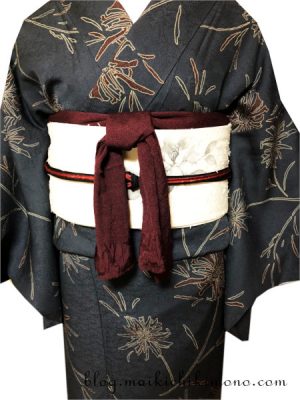
お太鼓結びの続きです。
帯締めには「丸と平」タイプがあります。平には表裏があるので方向を意識して結びます。
結び方は「本結び」です。すべての基本となる結びです。
帯揚げは丁寧に折りたたみながら結びます。
結び方は基本の「本結び」です。
お太鼓作りを復習したい方はこちらへ
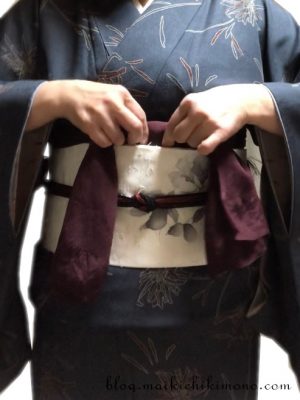
帯締めを本結びにする
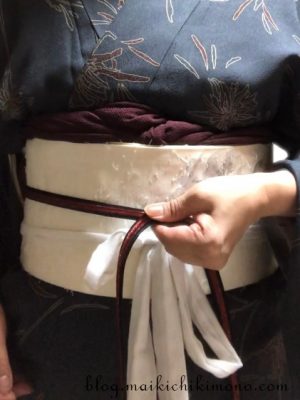
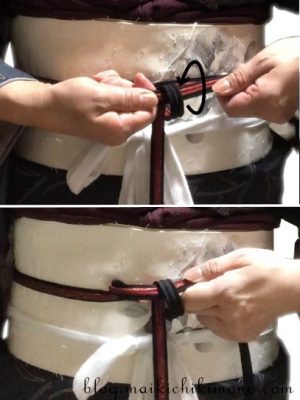
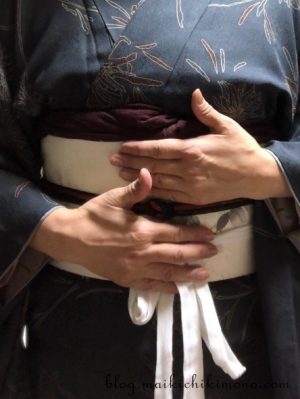
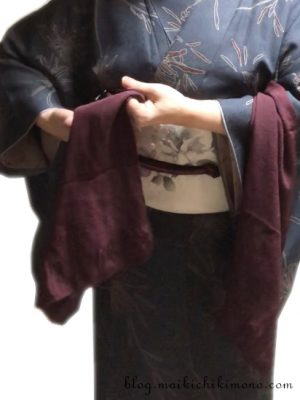
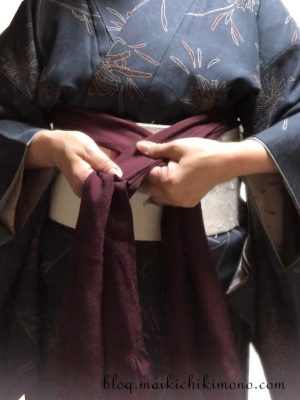
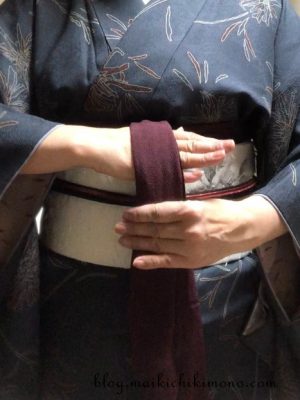
38. 帯締めの真中を持ち、お太鼓とテ先の間に入れる。帯締めを迎える手は平らにする。
Take the center of obijime and put it between otaiko layer and te.
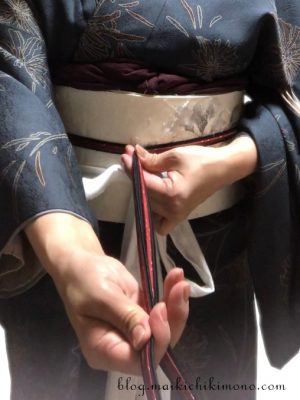
39. 前中心で帯締めの端を同じ長さに揃える。
Hold both ends equally.
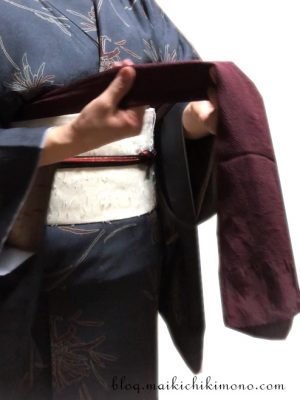
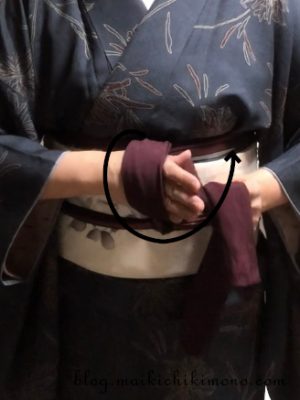
40. 帯締め左を上に交点を押さえる。
Cross them with the left side up. Firmly hold the intersection of the ends while pulling them forward.
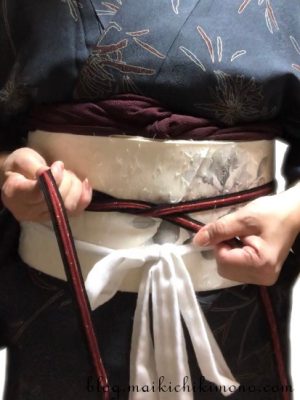
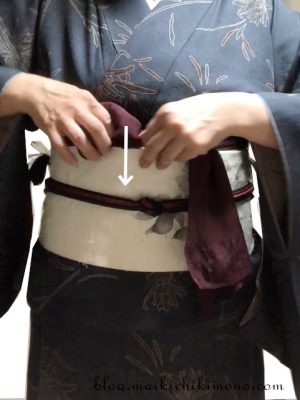
41. ひと結びする。
Tie it once firmly.
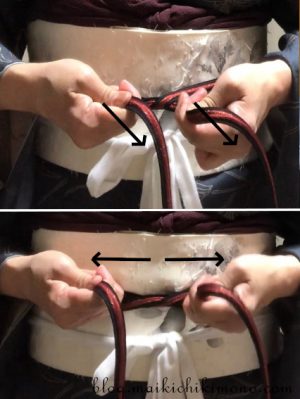
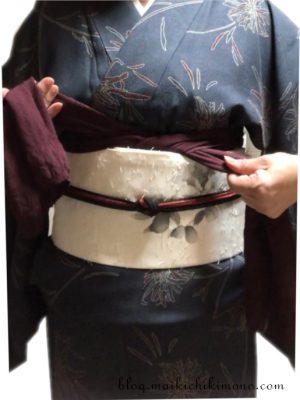
42. 結び目の根元を持ち、脇を締めながら2~3度「伸ばす・締める」を繰り返す。
Hold the ends at the base of the knot, and repeat “stretching and tightening” a few times.
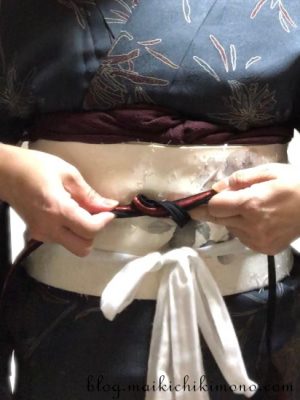
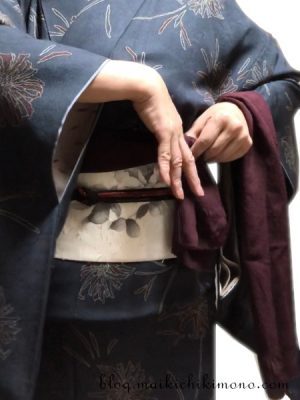
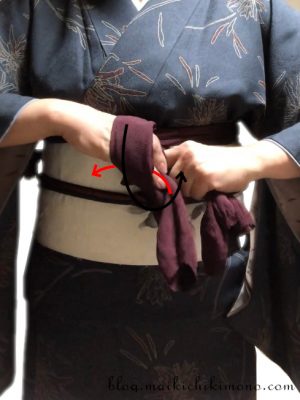
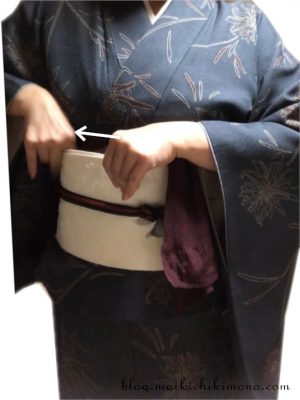
43. 締めた結び目を緩めないように小指で押さえつつ。右手を結び目方向に返し、右端を上に向けておく。左端を下方に向けておく。
Hold the knot firmly with your little finger so as not to loosen it. Turn your right hand to the left. Then put the right end up and the left end down.
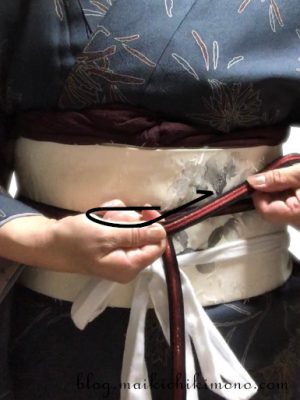
44. 左端を下から上に持ってきて、右手を返してできたU字に通す。
Twist the left end around the right end once.
45. 最初の結び目が緩まないように余った指で押さえつつ、結び目をじわっと丁寧に締める。
Hold the first knot with any fingers so that it does not come loose, and carefully tighten it.
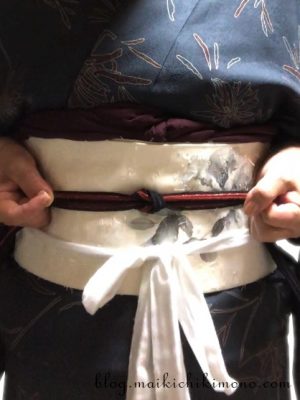
46. さらに真横にしっかり締める。
Tighten more.
絶対緩ませない!と言う気持ちで締めてください。結び目の縦線は左にありますか?
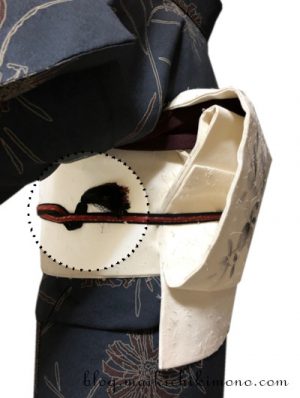
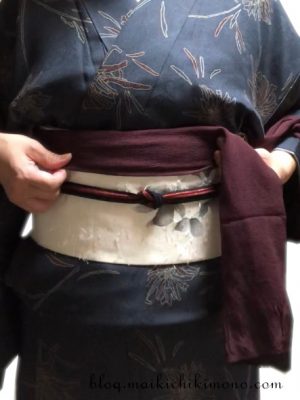
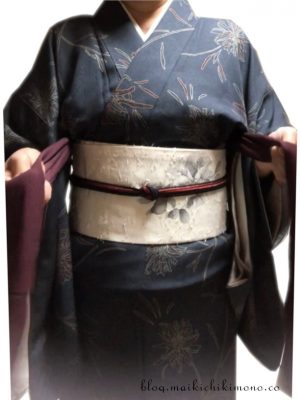
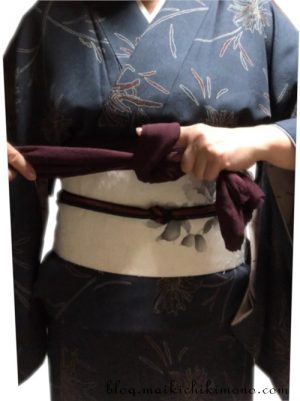
47. 胴の帯締めと揃え、なるべくお太鼓に近い脇で房を上向きに挟む。
Tuck the ends in close to otaiko with both tassels facing up.
48. 基本の帯締めの位置は真中。柄によって少し下でも。
Set obijime in the middle of obi. You can lower it if you want to show dou-gara, a front pattern well.
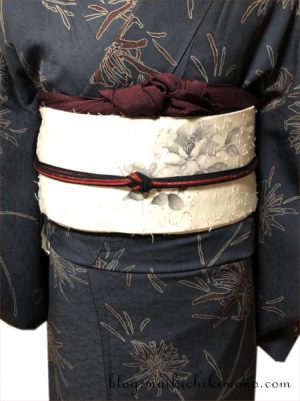
49. 帯締め完了。お太鼓の仮紐を外す。
Finished. Take karihimo away.
動画もございます。
帯揚げを本結びにする
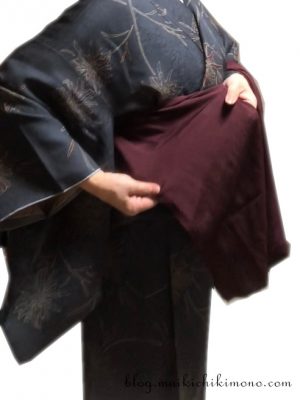
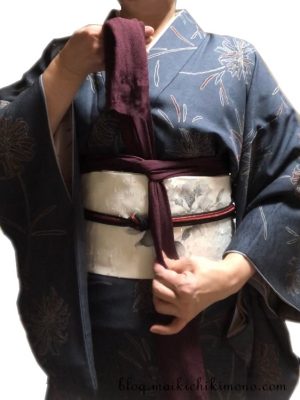
50. 帯揚げを本結びにする。下前側を脇まできれいに広げる。
Untie obiage and unfold the right part first.
。
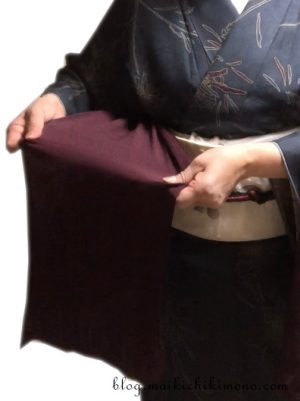
51. 表を上に向ける。
Open with the front side facing up.
52. 手のひらを使い3分の1に折る。(帯揚げ幅にもよる)
Fold it in 1/3 using your palm of your hand. (Depending on the width of obiage.)
53. さらに半分に折る。幅が4~5㎝ほどが理想。指で真中に筋を付けるようにしごく。
Fold it in half sliding the fingers. It’s just like drawing a line with fingers. A width of 4-5 cm is good.
54. 胴帯に沿って引き、前に預けておく。
Pull the right part and rest it along the upper line of obi.
55. 上前側も同様に折る。
Fold the left part in the same way.
56. 両方を手に持ち、前に引き脇を締める。
Hold both parts and pull them forward.
帯揚げを結ぶ間も前方の引きを保ってください。帯揚げをたるませないように必ず脇を締めてください。
57. 左(上前側)を上にし、交点を押さえる。(緩まないように常に前に引いている状態)
Cross both parts with the left side up. Firmly hold the intersection of both parts while pulling them forward.
58. ひと結びする。
Make a knot.
59. 結び目を立てる。
Rotate it 45 degrees clockwise.
60. 結び目の根元を開き、折りを整える。上を右手の甲に掛ける。
Straighten the fold and put it on your right hand.
61. 手の甲に掛けた方の端を持ち上げ輪を作る。
Make a loop with the right part.
62. もう一方の先端を右手の指で取り、61で出来た輪に通す。
Pick up the left part with the right fingers and pass it through the loop.
63. 62の先端を引き抜くと同時に左の人差し指でその輪を支える。
Pull it through while supporting the loop with the index finger.
指で支えることにより折りが乱れるのを防ぎます。
64. 結び目にふんわりと余裕を持たせる。 結び目は固結び厳禁!
Make a loose knot. Don’t tie it firmly.
65. 結び目をきれいに折り、帯板(帯)と伊達締めの間に入れる。折ることできれいな線が出る。
Fold the knot half and put it between obi and datejime. So you’ll get a beautiful line.
66. 下前の端から処理する。折りにたたんで下に落とす。
Put the right end in.
67. 落としたところから横に流す。上前側も同様に処理する。
Slide it aside along the obi line. Do the same for the left part.
68. 帯揚げの出具合をお好みに整え、全体を確認する。着上がりチェックへ。
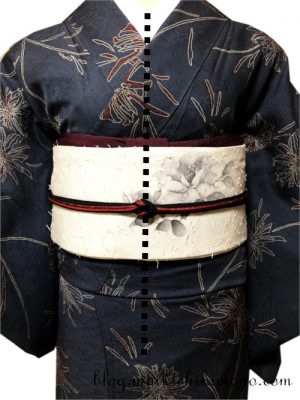
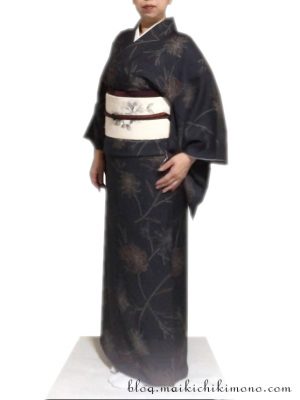
前中心で半衿と衿の交点、帯揚げ、帯締めの結びを一直線に揃えます。
Make sure that the intersection of haneri, the knots of obiage and obijime are aligned at the center front.
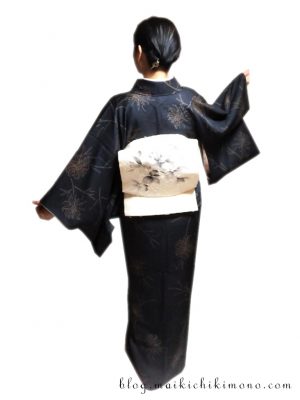
69. はい、結び上がりました!
Finished!
70. 頑張りましたね!
You did it! Put on zouri and go out!
おっと、動画もございますよ。
はい、これできものの着付けが完了です。
草履をはいてお出かけしましょう!