腰紐は上手く結べましたか?
次は着付けの中でも重要なおはしょりの処理です。
きっちり布目を合わせていきましょう。
ここで気を付けるポイントは
- 上前下前を一度揃えておはしょり線を出す
- 衿合わせ
- 胸紐と伊達締めの締め方、締め具合
です。
衿先の位置を確認する
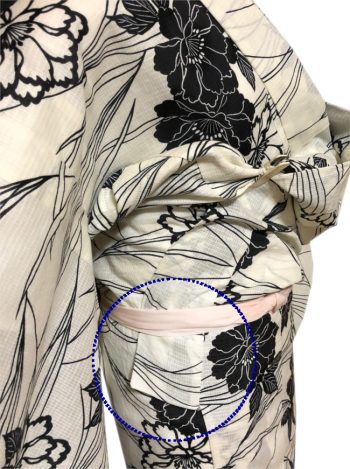
1. 上前の衿先は腰紐でしっかり押さえられているか確認。
Make sure that the left end of the collar is firmly held by koshihimo.
写真は5~7センチで少し長めですが、左の衿先は3cmほど出ていれば安心です。
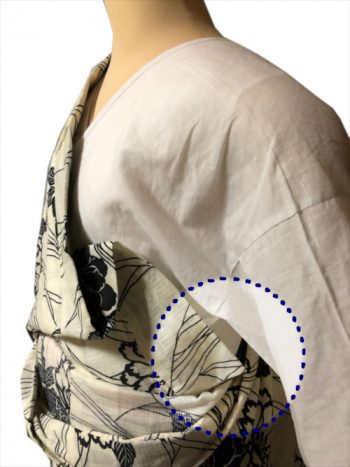
2. 下前の衿先を腰紐の上に丁寧に引き出して下前が下がらないようにする。(見えるように袖を外している。)
Pull out the right end of the collar above koshihimo so as not to get the lower skirt part loose.
おはしょりを整える
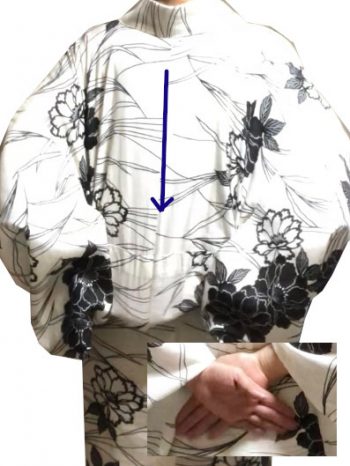
3. 身八口から後身ごろに両手を手刀にして入れる。
Put the hands inside the center of the back.
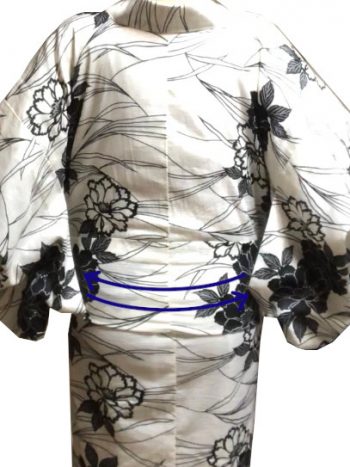
4. 背中心から脇に向かって手を動かし、おはしょりの下線を真っ直ぐに整える。
Move the hands from the center to both sides to make the line of ohashori.
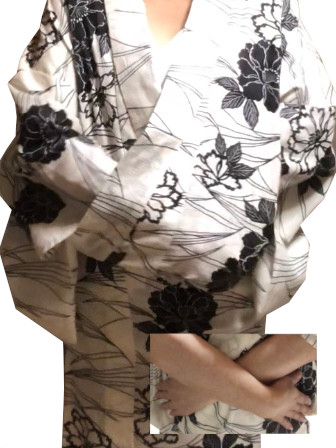
5. 前は右手を上前の下左脇、左手は下前の下右脇にそれぞれ手刀を入れる。
Put the left hand inside the right part from miyatsuguchi, a side opening, and put the right hand inside the left part.
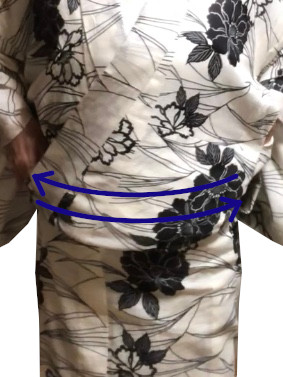
6. 真横に線を引くように両手を滑らせる。
Move the hands to the sides at the same time to make the line of ohashori sharp.
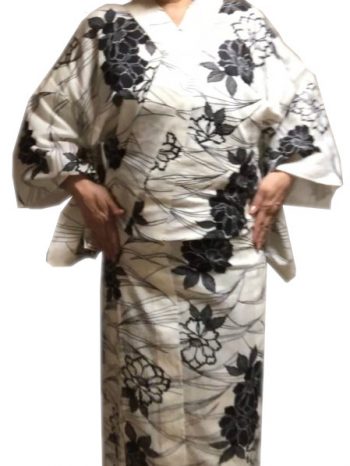
7. 上前と下前のおはしょりが合っているか確認する。綺麗に揃って厚みもなければそのまま8へ。おはしょりがモコモコして厚みがあるようなら下前を折り上げる。14へ。
Check your front ohashori. If it is thin, go on with 8. If the tuck is thick, fold the extra fabric up to make it thinner. Let’s jump to 14.
衿を合わせる
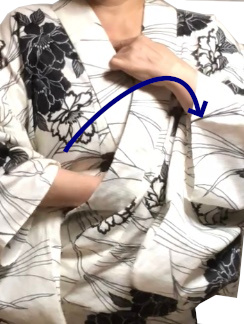
8. お好みの衿合わせの交点を決め、指をガイドにして胸を被せるように下前の衿を整える。
Place the collar of the right part like wrapping the breast and do the same for the left part.
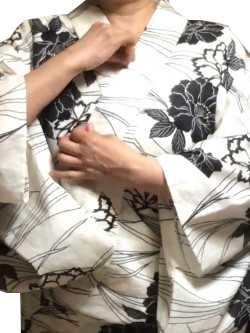
9. 上前の衿も同様に整える。
Do the same for the left part.
胸紐をする
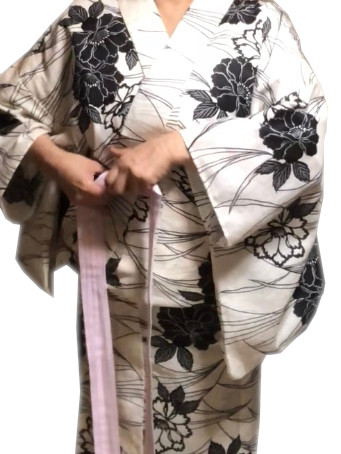
10. 右手で上前の衿を押さえつつ、左手で胸紐を取り、右手に持たせる。
Hold the collar under the breast firmly. Take the center of munahimo with the left hand and pass it to the right hand.
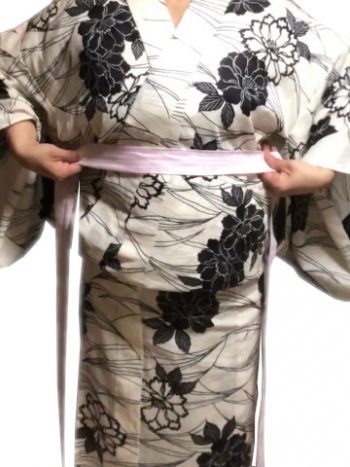
11. 紐の位置は胸下。左手を横にすべらせ脇まで来たら右手も後ろへ回し、背中で交差。
Slide munahimo to the back and cross it on the back.
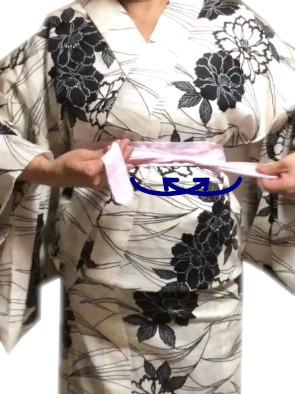
12. 紐を前に戻し二回からげ、紐端を交差させる。
Bring it back to the front, make two loops and cross the ends.
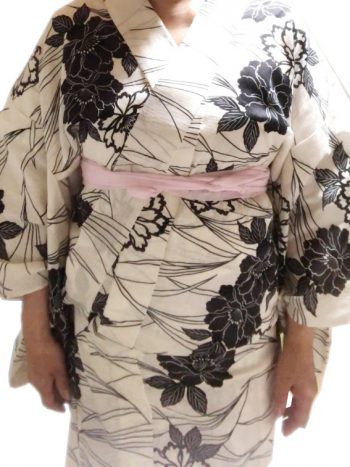
13. 結んだ紐端を胴紐に挟み込む。胸、背中のシワを取る。20へ。
Tuck them in. Okay, jump to 20!
下前を折り上げる
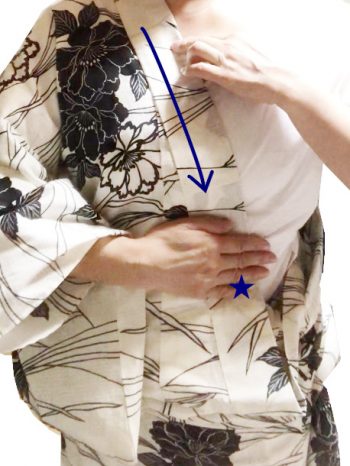
14. 衿合わせの交点を決め、右手を下前の衿に上から滑らせ胸下にもっていく。
If your ohashori is thick, start from here. Slide the right hand along the collar and stop it under the bust, making sure the cross point of the collar with the left finger.
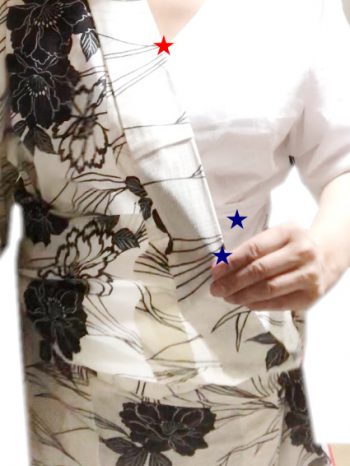
15. 4本目の指の位置の高さを変えず左手で前に突き出す。★と★は同じ位置。
★ the blue stars are the same place as the fourth finger (no.14). Move it forward horizontally. Be sure to keep the position of the collar (★ the red star).
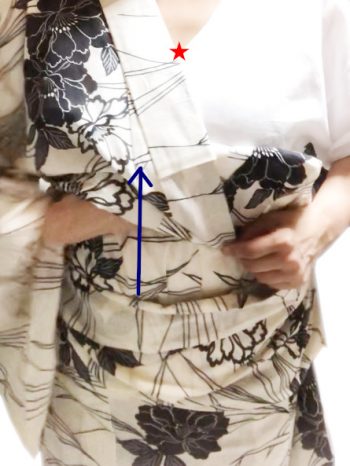
16. 余っている布を内側にたるみなくすっきり↑折り上げる。
Tuck in all extra fabric at the front.
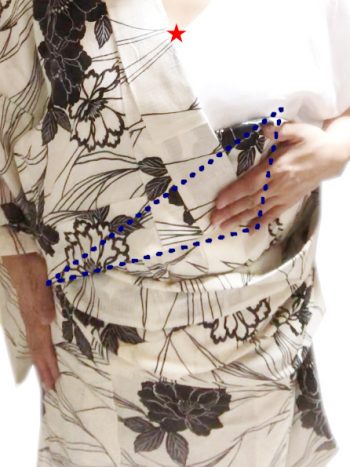
17. 三角に折り上げたところ。
Make a triangle on the chest. This is the view after tucking.
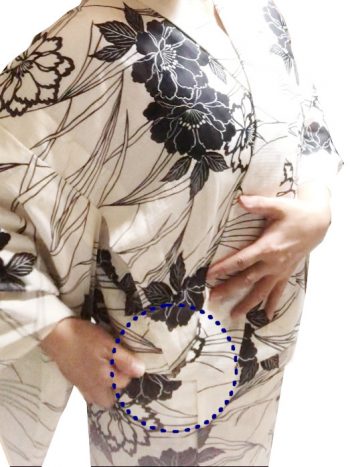
18. 上前の衿を合わせる。上前と折り込んだ布はおはしょりの下線でつながっているか確認。(丸点線内)
Match the lines of the front and rear ohashori on the right side.
おはしょりが長い場合はきれいなおはしょりは気持ちいい。をご覧ください。
19. 胸紐をする。
- 右手に持たせる。
- 背中で交差。
- 2からげして交差。
- 両端を挟む
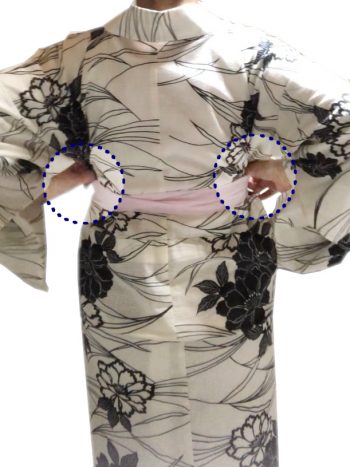
20. 親指で後身ごろを前身ごろの内側に入れるように押し込みシワを取る。
Remove wrinkles on the back. Push the back part at miyatsuguchi into the front part with both thumbs at the same time.
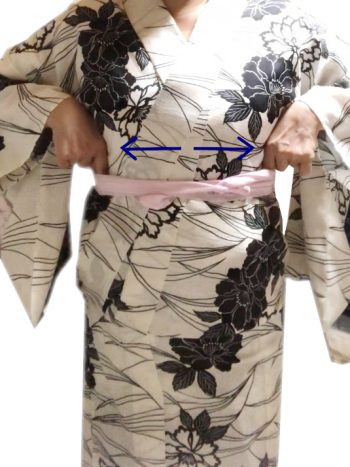
21. 指で胸のシワを取る。
Remove wrinkles at the front.
伊達締めをする
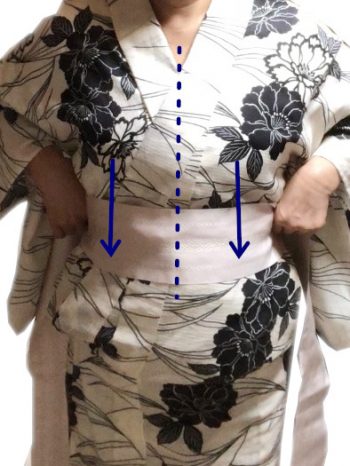
22. 伊達締めの中心を前中心に合わせ、胸を撫でる様に伊達締めをおろす。
Place the center of datejime on the upper part of the chest and slide it under the breast.
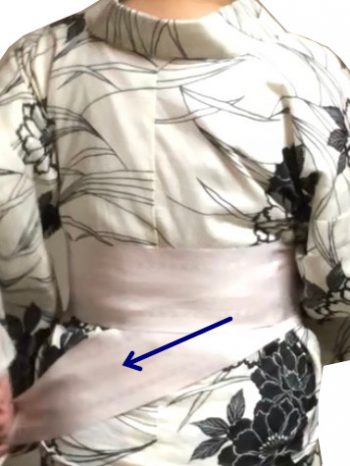
23. 背中で一方の端を下げて交差させる。
Cross datejime at the back and pull one side down.
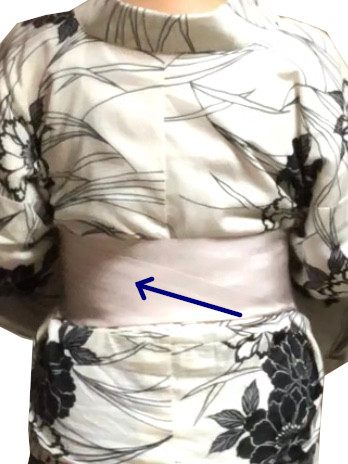
24. 下向きの方を折り上げる。
Fold it up.
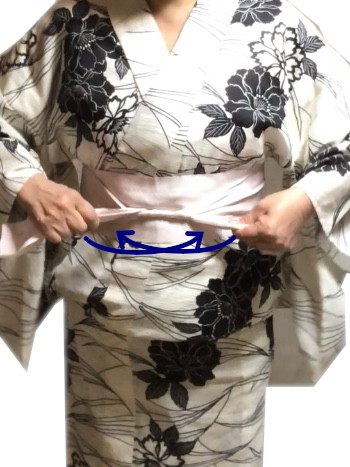
25. ひと締めして前で二回からげ、結び目を交差させる。
Bring the ends to the front. Make two loops and cross the ends.
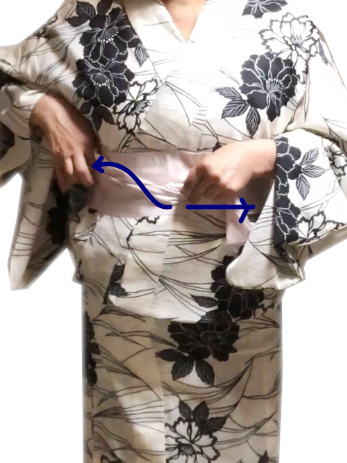
26. 両端を胴の紐に挟み込む。その時必ず一方は結び目が緩まぬように逆方向に引いておく。
Tuck them in one by one while holding the twisted knot.
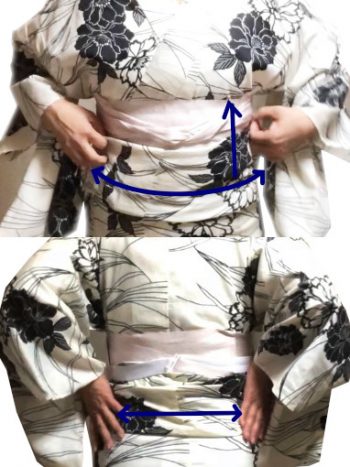
27. おはしょりを確認。長い場合は伊達締めに挟み込んでも良い。
If ohashori is long, shorten it and put it into datejime. Make a sharp line around the hip.
.
28. 上下の衽線は繋がっているか、前後のおはしょり線はつながっているか確認。崩れないようにクリップを使っても良い。
Make sure that the seams on ohashori are connected to the seams on okumi . Let’s see the circle. Pinch there with a clip to keep the line of ohashori sharp.
帯板を付ける
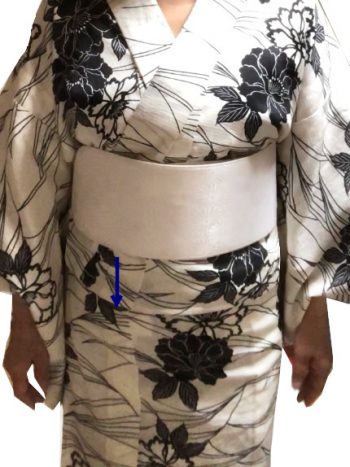
29. くるっと帯やベルト付きの帯板はここで装着。
Put your obiita with a belt on datejime.
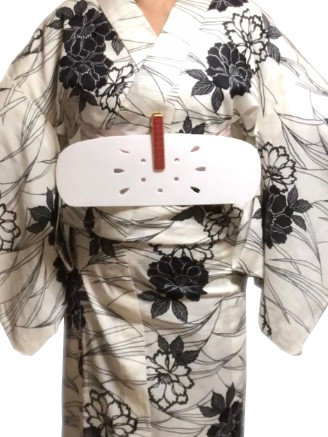
30. ベルト無しの帯板はクリップで固定する。
If you have a simple obi-ita, clip it on the front.
浴衣の着付けが完了しました。
帯を結ぶ準備ができましたね!
ポイントに気を付けておさらいしましょう。
|
次は半幅帯で浴衣に”しだれ桜”を結びます。
半幅帯は扱いが楽で、結ぶ方法は多種多様です。 また、同じ結び方でも色々な名前を持っています。 その中でも”しだれ桜”は浴衣と普段きものにふさわしく、最も簡単でアレンジがいくらでもできる結び方です。 今回は3.5メートル、リ[…]

